


Miro
Miro is an online canvas for collaborating with students or colleagues. Information can be represented visually with built-in templates, such as mind maps and flow charts. You can add text, photos, videos, links, drawings and files.
Miro vs. Microsoft Whiteboard
Miro has a limited number of licences at the AUAS and therefore limited availability. Microsoft Whiteboard is developing rapidly and has recently been equipped with many new features. It is available to all HvA staff without restrictions and is fully integrated with Microsoft Teams. We therefore recommend Microsoft Whiteboard for most users. Read more about the program in our article Microsoft Whiteboard.
FDMCI employees can apply for a Miro account via the Information Management Self Service Portal. After a successful application you can login to the Miro Single Sign On page with your HvA e-mail address and password.
Features
Posting and arranging Post-its
Miro allows users to visualise thoughts, ideas and processes by using post- its. These post-its can then be moved around and organised into groups.
Miro maps are infinitely large. This allows you to place several mind maps and flow charts next to each other on each Miro canvas. Tip: do this in frames so you can easily switch between them during the lesson. You can hide frames from students until you need them in class. Watch the video below to get started.
Creating content in Miro (3:33)
Collaborating on a board
Hundreds of students or colleagues can collaborate on a board at the same time. Everyone can add comments, respond to each other’s messages or vote for the best idea. When clicking around on a board, it is easy to move a background or shape accidentally. For example, you may want to move a Post-it but instead move the entire column. To avoid this, lock your objects into place: select the object and click the lock icon. While collaborating you will see the participants’ cursors; you can switch these off with the blue arrow at the top. The button Bring everyone to me will bring everyone over to your board.
Collaborating, locking objects and switching participants’ cursors on and off (2:35)
Templates
Miro offers beautiful templates that you can immediately start working with. There are templates for mind maps, kanban boards and flow charts, as well as customer touchpoint maps, road maps, project kick-offs and much more. The overview of templates appears when you open a new board. If your template is not among them, check Miroverse for templates created by the worldwide community.
If you want to encourage interaction in a new team or working group in a fun way, Miro offers countless icebreakers: templates with fun questions or mini-games. This is especially practical for online groups. The Icebreaker blog has explanations and examples.
When you have chosen your template and modified it to your liking, you can save it in order to reuse it. This comes in handy if you want to use it in various lectures and in the next academic year. You can also share templates with colleagues: click custom templates.
Timeboxing sessions with built-in timer
Without a time limit, meetings, presentations and brainstorming sessions often run over time. With the timer, you can timebox sessions so everyone can see how much time is left.
Didactic tips
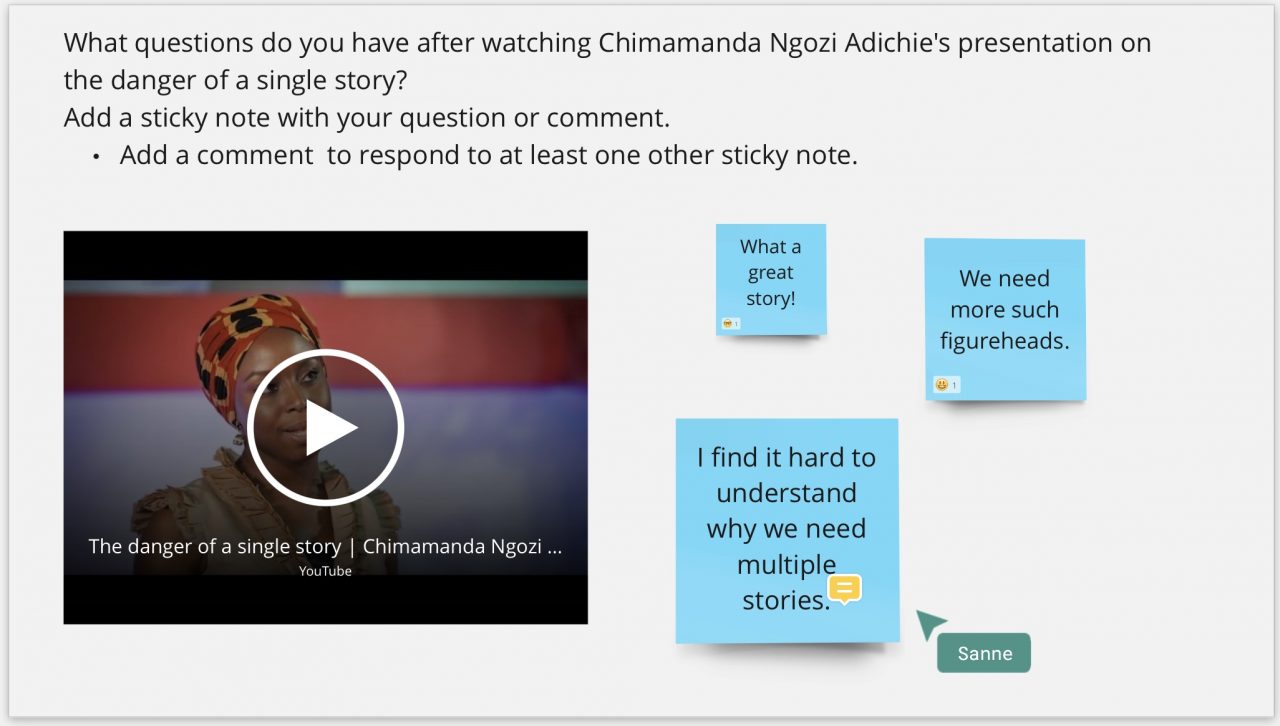
- Post an article, video or statement and have students post their question or comment on a sticky note. Ask them to respond to at least one fellow student’s contribution.
- Let new groups meet each other or have a short break using an icebreaker. The MIRO community has games and assignments.
- Activate students by using visual assignments to make online or offline lectures interactive. Watch this video (1:09) for more inspiration.
- Encourage cooperation by asking students to share information and respond to each other’s work.
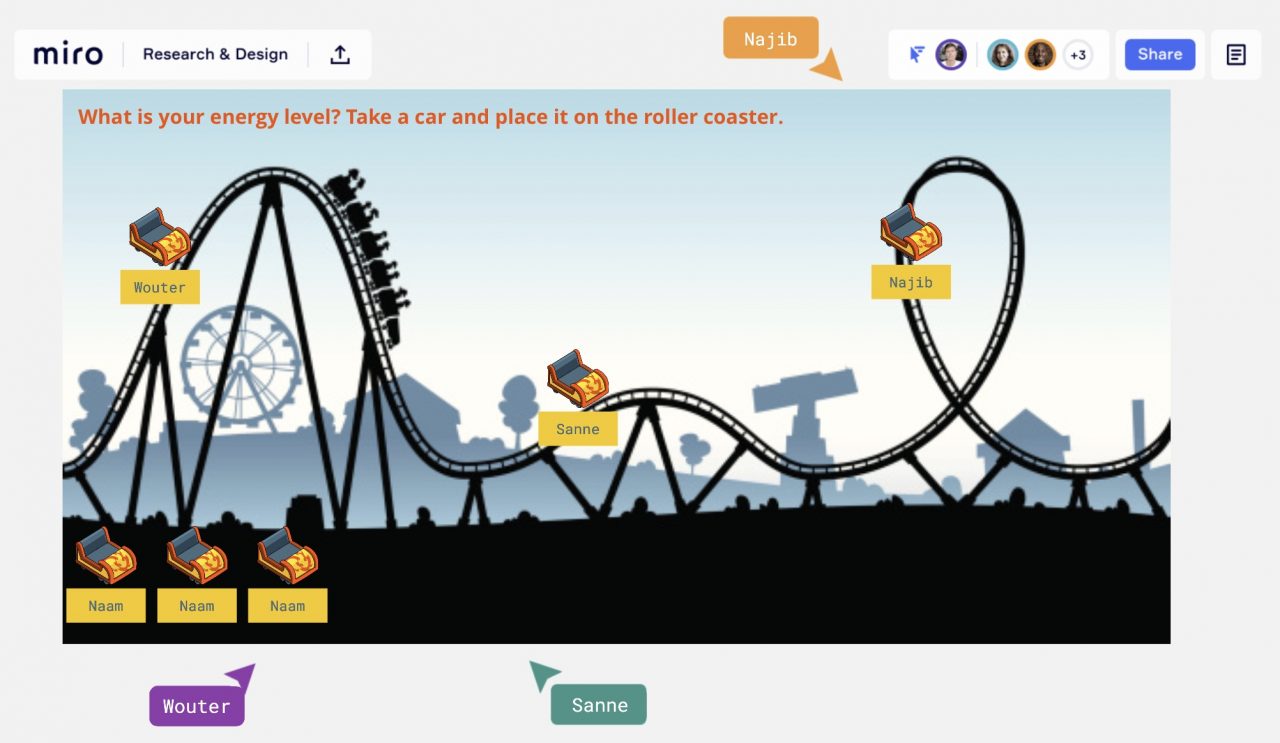
- Use check-in moments for students to indicate visually what they thought of the lecture or how they feel, using Post-its, emojis or the raise-hand feature. For instance, with a roller coaster:
Whichever way you use Miro, students have to know how it works, so ask them to watch the above-mentioned videos before starting. You can include the following line in your course: If you are not yet familiar with Miro, see: Creating content in Miro (3:33) and How to collaborate in Miro (2:35).