Microsoft Whiteboard
Microsoft Whiteboard is a digital canvas on which you can collaborate with students and colleagues. You can visualise ideas and work creatively with drawings, post-its, images, documents and handwritten text. With the built-in templates, for example for a brainstorm, lesson plan or kanban, you can get started quickly.
Whiteboard is available in Microsoft Teams and via: whiteboard.microsoft.com (log in with your HvA account). No need to create a separate account.
Whiteboard vs. Miro
For most users, we recommend Microsoft Whiteboard over Miro. Whiteboard is rapidly developing and has recently been equipped with many new features. It is available to all HvA employees without restriction and is fully integrated with Microsoft Teams. Miro has limited availability due to the small number of licences.
Features
Visualising ideas
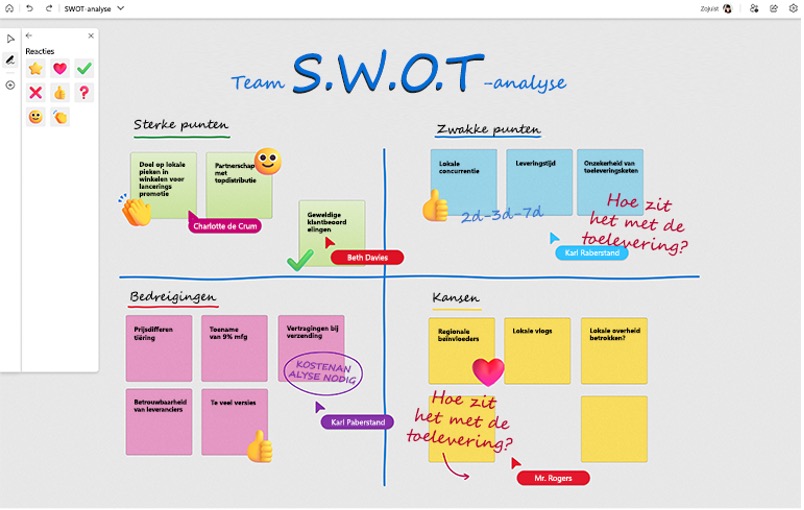
Visualise ideas and processes with post-its, handwritten text, shapes and arrows. You can move post-its around and organise them into groups.
Drawing
In Whiteboard, you can draw freely with different pens and colours. Use the Auto Enhance Handwritten Shapes feature to make your drawings look good. You can also add shapes.
Collaborate
Students or colleagues can collaborate on a board at the same time. Everyone can add comments, respond to each other’s posts and vote for the best idea.
Templates
Whiteboard offers several templates you can get started with right away. There are templates for brainstorming, problem solving, project planning, looking back, learning, games and much more.
The whiteboard is infinitely large. You can therefore place several mind maps and flow charts next to each other on your whiteboard.
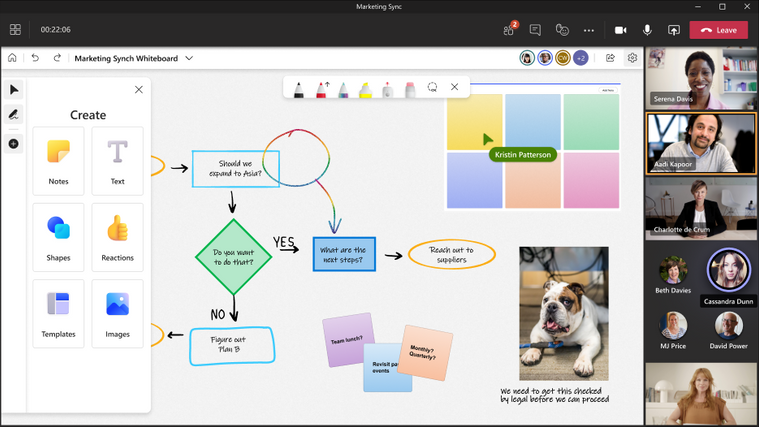
Whiteboard in Teams meetings
Whiteboard is integrated in Microsoft Teams. It allows you to easily visualise your message and collaborate during an online lesson or meeting.
When you open Whiteboard, you indicate whether you are going to present, where only you can edit, or collaborate, where everyone can edit. A handy feature that prevents students from changing the board during your explanation. You can adjust this during the meeting.
You can also use Whiteboard in Breakout rooms; each room then has its own board.
The whiteboard is saved in the meeting and all your boards can be found via whiteboard.microsoft.com.
For more information, watch this video:
Do you have a tablet? Then you can use it to open Whiteboard in a team meeting. This gives you a second screen and allows you to draw with your fingers or a pencil (more info).
Didactic tips
- Enrich your (online) lesson with text, drawings and images so that your message sticks better.
Create your board in advance, which saves valuable lesson time. To do this, open the Team Meeting and click on the Whiteboard tab.
After your explanation, have students summarise key points on post-its. For more info, check out Student activating teaching methodologies.
Post an article, link to a video, powerpoint slide or statement and have students post it their question or comment. Have students respond to at least one other contribution.
Encourage collaboration by having students share information and respond to each other’s work.
Encourage engagement by having students respond to ideas.
Introduce new groups to each other or take a break with an ice breaker. There are templates for games and assignments.
Want more examples of how to use Whiteboard in your lesson? Then read: 6 manieren om je les te verrijken met Microsoft Whiteboard. (in Dutch) - Reuse boards for different classes or for next school year. Go to Onedrive – Whiteboards to duplicate a board via copy and paste.